


How to customize browser notifications
When you’re browsing the web, you may notice that a pop-up sometimes asks you if you’d like to see notifications from the site you’re on. If you approve this, you’ll start seeing notifications such as your favorite store offering a new sale or your favorite artist’s new single. While helpful, these notifications can be distracting and sometimes even tedious. Fortunately, you can choose the type and frequency of the notifications that you receive. These options are tucked away in your browser’s settings and can be a bit tricky to find. Here’s a step-by-step guide to customizing your browser notifications so that they work for you.
What are push notifications?
If you use a smartphone or PC, you’ve probably encountered push notifications, even if you’re not aware of what they are. Push notifications are the alerts and notifications that pop up along the top or side of the screen even when you don’t have the associated app or program open. An incoming text message may display a similar alert at the top of your screen showing who texted you and a brief preview of the text. Push notifications work the same way, showing the app that’s notifying you and some relevant information.
The nature of the push notification may differ from app to app. A website that you enter for the first time may ask if you’d like to “enable browser notifications.” If you do so, even when you don’t have the website open, you will receive push notifications from the website. An example of this is Twitter, which may send you an alert if someone you follow tweeted something or if someone retweeted one of your tweets.
Push notifications are often curated to information relevant to you. For example, if there’s a storm coming through your area, your phone’s weather app may use your location data to send you a push notification about the sudden change in weather. Push notifications will still come through when you don’t have the respective app open, so you’ll have to disable them entirely if you want them to stop.
What are the benefits of push notifications for users?
Website and app push notifications can help you find new or updated information without having to constantly check and refresh the page. If you want to know when you get an email from someone, you can enable push notifications on your desktop and phone, so you’ll be notified when a new message comes in. If you follow someone on a site like YouTube or Facebook, you can also enable push notifications to get an alert when that person posts new content.
Push notifications are also designed to function when you don’t have an application open on your device. On a desktop, this doesn’t mean as much, as most PCs can easily handle multiple applications functioning at once. However, on the phone, this means saving the battery life that it would take to keep the application constantly open as you check it.
Should you allow or block browser notifications?
Push notifications ultimately come down to your priority and preferences. Many apps and websites will want to send you push notifications, so you keep coming back and engaging with their service. However, this is not always ideal for you. You may have just been checking the price of a new computer on an online retailer and don’t want to be constantly reminded every time there’s a computer sale going on. A lot of the default push notifications are just online “noise” that clog up your browsing experience, making it annoying to use your phone or PC.
However, there are certainly cases where you may also want browser notifications. With apps like YouTube or Instagram, you may want to know when someone you follow posts a new video or photo. You may also want to be notified when you’re tagged in a piece of content, as it’s probably relevant to you. You may follow news channels and want to be notified when there’s some breaking news.
Luckily, most apps and websites allow you to enable and disable the kinds of push notifications that they’re allowed to send you. OneLaunch+ also has the features that allow you to block all notifications and pop-ups in case you need to get rid of all distractions and focus on what you’re doing. It’s up to you to determine what push notifications are relevant to you.
OneLaunch, Chrome, and Chromium
First Method:
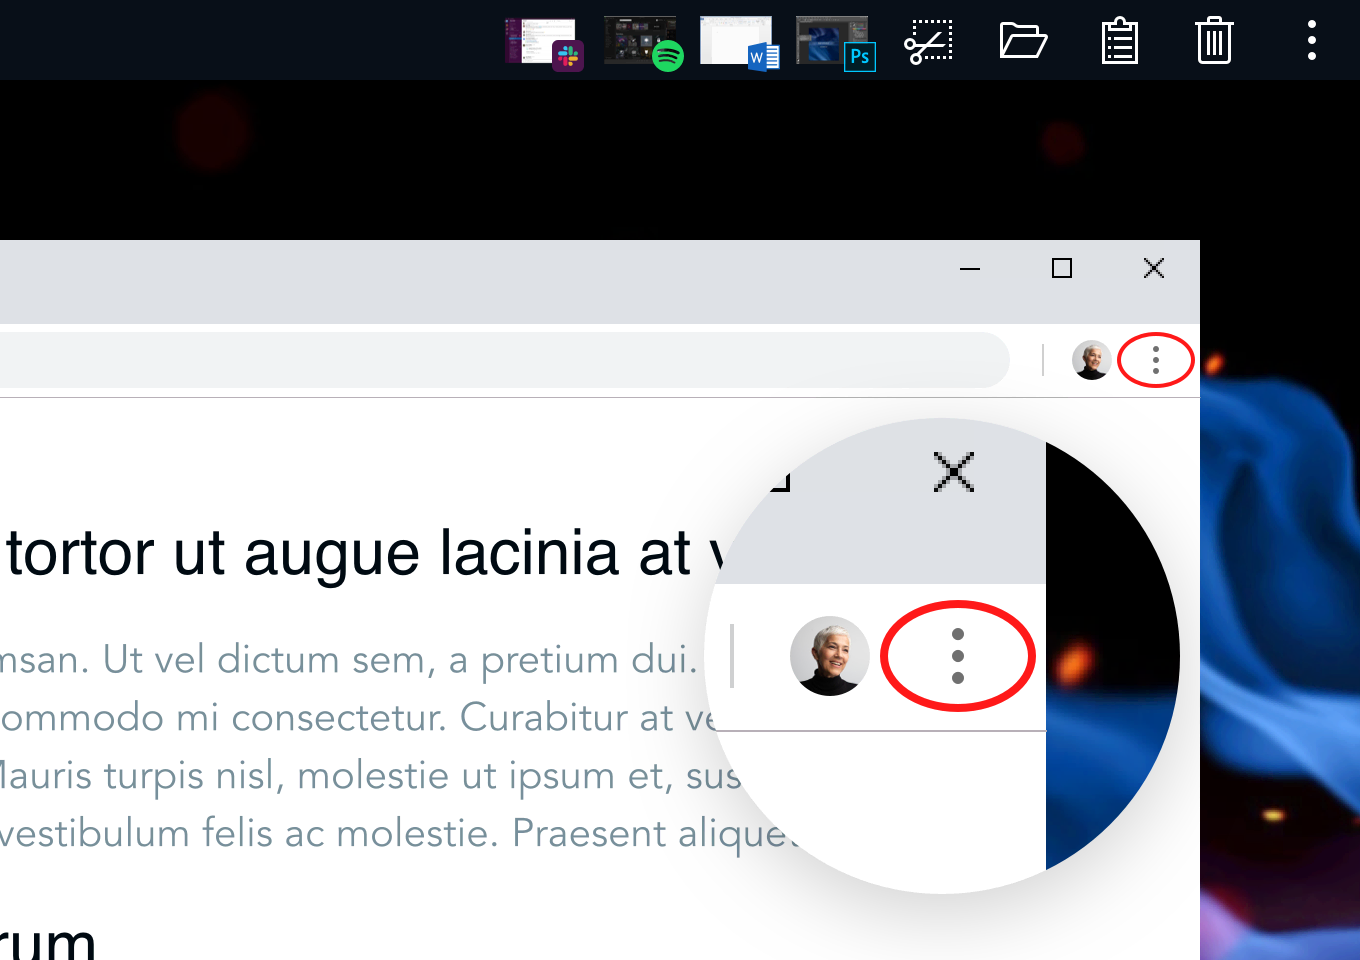
If you happen to use OneLaunch, Chrome, or any other Chromium-based browser, changing your notification settings is actually pretty simple. First, click on the three dots on the top right of your browser. Scroll down this menu and click on “Settings.” From there, find the “Privacy and security” section, click “Site settings,” and then “Notifications.”
In this menu, you can allow or block all site notifications or adjust specific website permissions. Alternatively, you can enable “quiet notifications.” This unique setting means that your browser won’t show you notifications from sites that you regularly block them from.
This is especially helpful if you’re in a meeting and sharing your screen for a presentation. You definitely want to block push notifications when you’re sharing your screen!
It’s important to note that if you’re using Incognito mode, you won’t get any notifications.
Second Method:
To change the notifications for a specific website without messing with your Settings menu, start by navigating to that site and clicking on the padlock inside of your address bar. This opens the Site Information menu. Inside, you’ll see a notifications section with a drop-down box that you can set to the option you prefer.
Edge
First Method:
Now that Microsoft Edge is Chromium-based, you can simply follow the above instructions for managing notifications in Chromium browsers. However, there is a slight difference. Choose the “Cookies and site permissions” section instead of “Privacy and security.” The notifications menu itself is identical to the one in other Chromium browsers, including the option to use quiet notifications.
Second Method:
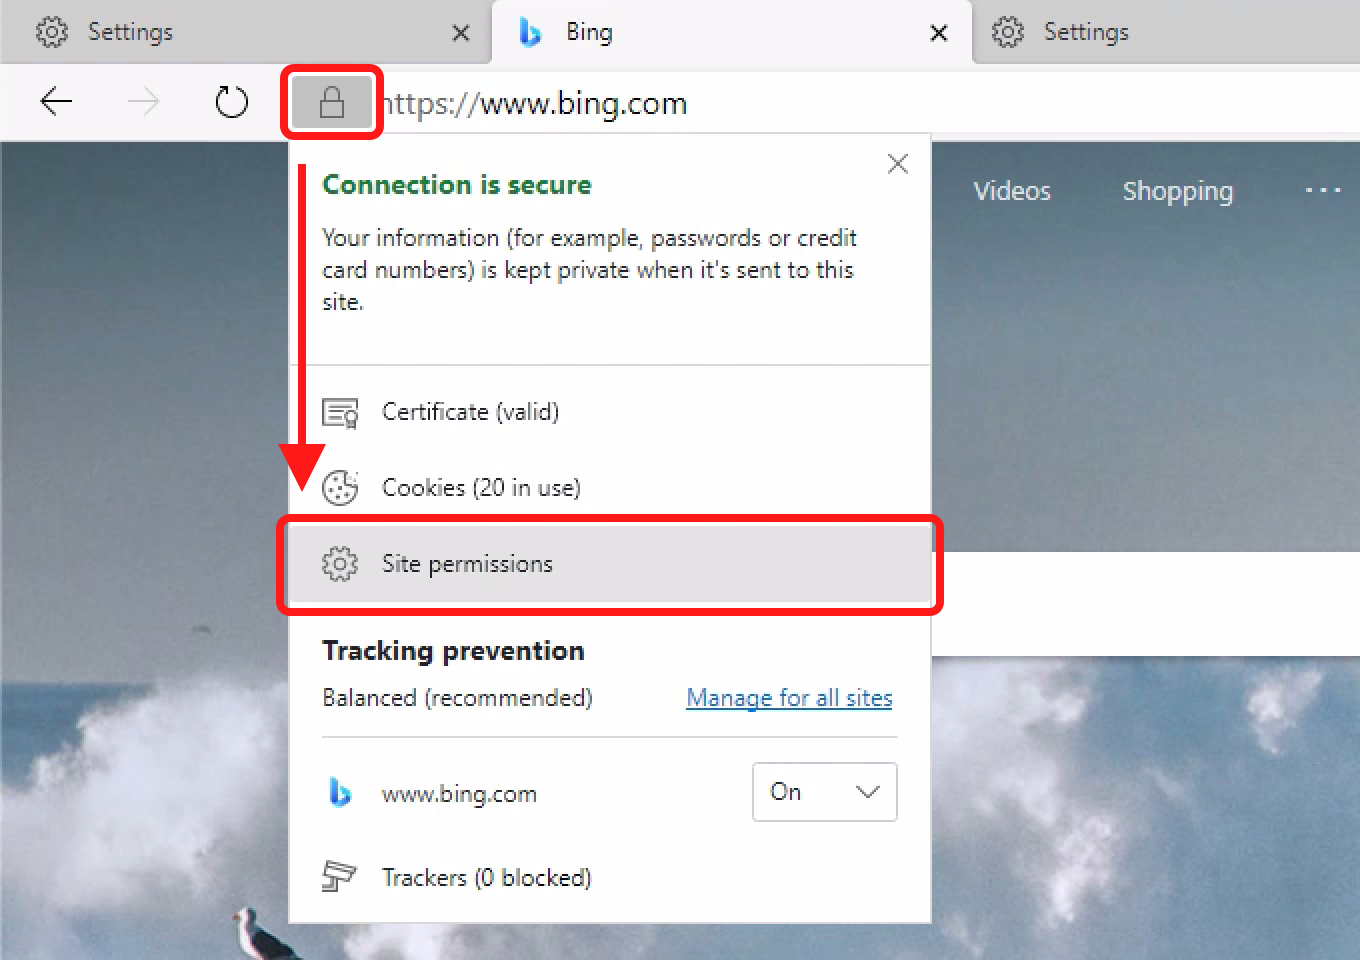
In Edge, you can change the settings for a specific site by traveling to that site and clicking the small padlock in the address bar. From there, click on Site permissions. This section allows you to change all of the settings for this site. Simply find “Notifications” and set the drop-down box to the setting that you like best.
Firefox
First Method:
Firefox’s notification options are slightly different than some other browsers’, but they’re still pretty simple to change. Start by clicking the three bars at the top right of the browser. Choose ‘Privacy & Security’ from the left pane. Scroll down to the ‘Permissions’ section and click the Settings… button next to “Notifications.”

In this menu, you’ll only see websites that have offered to send you notifications. You can manually adjust each site’s notifications by changing the drop-down box next to the site. Alternatively, you can remove the site or all sites from this section, resetting them and allowing them to ask you for permission again. You can also check a box near the bottom to block any notification requests.
Second Method:
Like in the other browsers, you have a second method to manage notifications. First, travel to a site that you would like to customize notifications for. Click on the padlock in the address bar and click the arrow next to the connection information. In this box, choose “More Information.” Click the “Permissions” tab from the top section and scroll to the “Send Notifications” area. Untick the box if you want to change the setting and then simply select the option that you prefer for this site.
Some Parting Advice
Notifications can be helpful or distracting, depending on the type and frequency. Customizing your notification preferences on a site-by-site basis allows for a smooth browsing experience while not missing out on major updates. If you would like to remove distractions altogether, OneLaunch automatically blocks all notifications and pop-ups from breaking your focus.


 Share On Twitter