


How To Manage File Downloads on Windows
When you download files, images, apps, and anything on a Windows device, it goes to your downloads folder by default.
It’s like that table in your home that accumulates junk mail, car keys and other odds and ends. Before you know it, the folder is out of hand and you can’t find anything!
As you download more files, you’ll struggle to find the files that you need if you don’t organize them on your computer. Downloads also take up extra space on your computer’s hard drives, so you’ll notice your computer’s storage space may be filling up with files that you don’t need anymore.
Fortunately, it’s fairly easy to sort through the files in your downloads folder! There are a few ways you can organize your files, whether you want to move them somewhere else or get rid of them entirely. Get ready for your digital spring-cleaning with these tips on how to manage downloads on Windows!
Where to Find Downloads?
In the Windows search bar, type downloads.
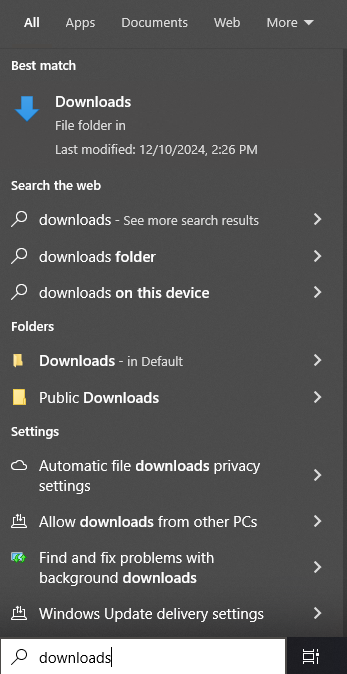
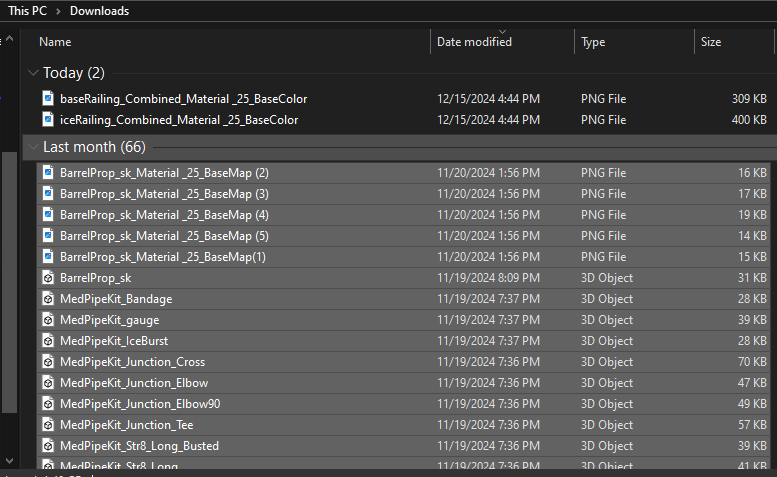
This will locate the downloads folder on your computer. You can click the downloads file folder to access your computer’s downloads.
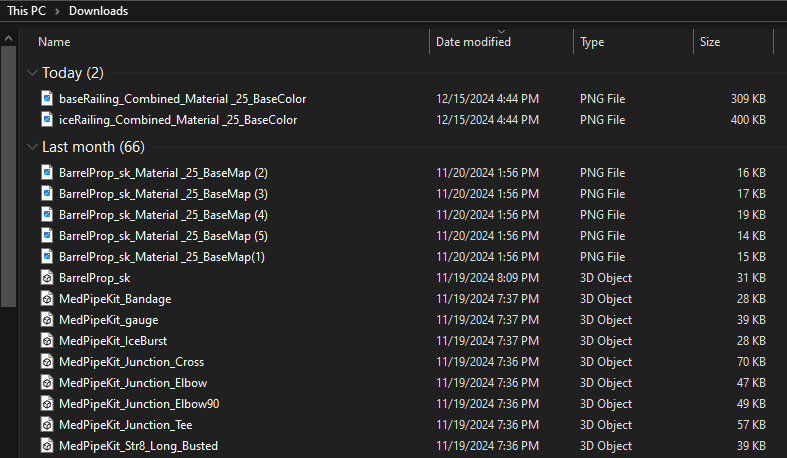
By default, all the files, pictures, and documents that you download will go to this folder. Downloads isn’t a temporary folder — the files that it contains won’t automatically delete after a certain period of time. However, the downloads folder can get very full and very messy!
If you have multiple hard drives on your computer or use a USB drive to store files, you’ll also find that the files within the downloads file are stored on your default drive. You may not want this, so all the more reason to sort and manage your downloads.
How To Manage or Delete Downloads?
Manage downloads
1. In your downloads folder, select the files you want to move.
2. Move the files to the corresponding place on the left-hand side of the file explorer.
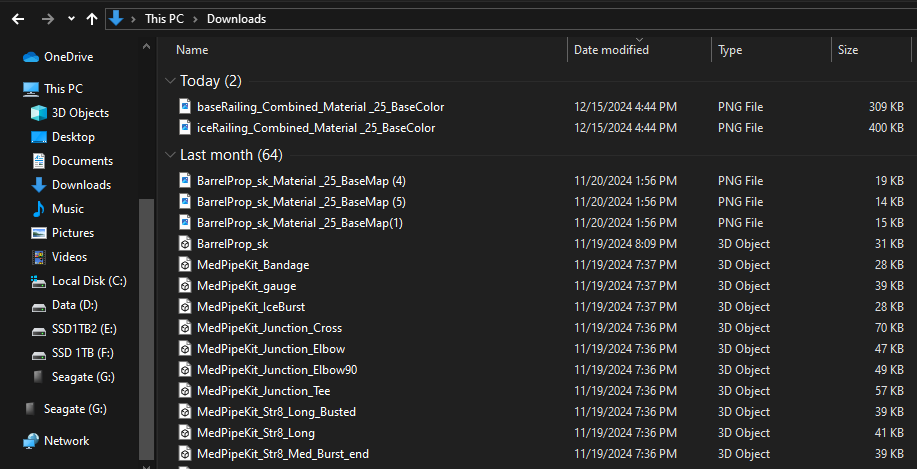
For example, if you have a bunch of documents that you’ve downloaded, you can left-click those files in your downloads folder and then drag them to the documents location within your “This PC” folder (Note that “This PC” may differ from your device’s name).
To move multiple documents at once, left-click and press the shift key and then click to select all the files you want to move. This will move the files in a range, rather than multiple individual files. To select non-adjacent files, left-click and press the ctrl key to individually select all the files you want to move.
3. Navigate to the new location you’ve moved your files to, to see your files!
Delete downloads
1. In your downloads folder, right-click the file you want to delete.
2. Click Delete.
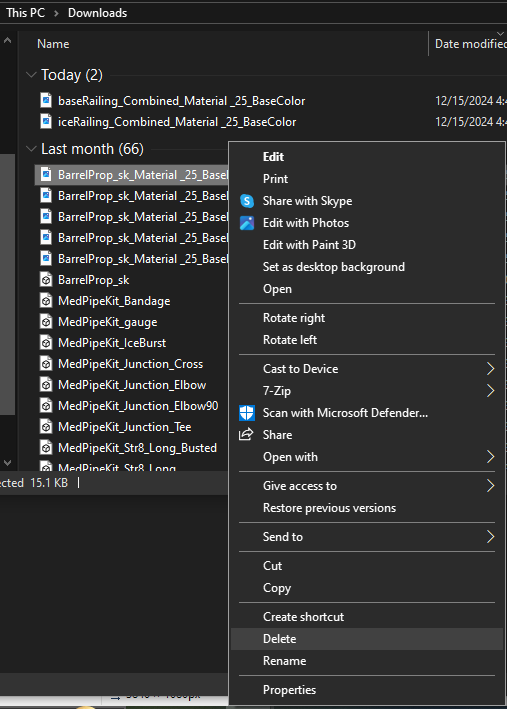
3. To delete multiple files, hold down shift and click all the files you want to delete. Then, right-click them and select Delete.
4. You can also click the date options to select all the downloads within a certain time frame.
Instead of right-clicking and selecting delete, you can also press the Delete key on your keyboard, located above the arrow keys.
Deleting files won’t remove them from your computer entirely. A deleted file goes to your computer’s recycle bin, which is a temporary folder that’s marked for eventual deletion. The icon for your computer’s recycle bin is located on your desktop. You can also find the recycle bin by searching for it on your computer.

Files within the recycle bin can still be restored, and they still take up space on your computer! You have to empty the recycle bin if you want to permanently delete those files and free up space.
To do this, open up your recycle bin and navigate to the Recycle Bin Tools. Under the tools, click Empty Recycle Bin.
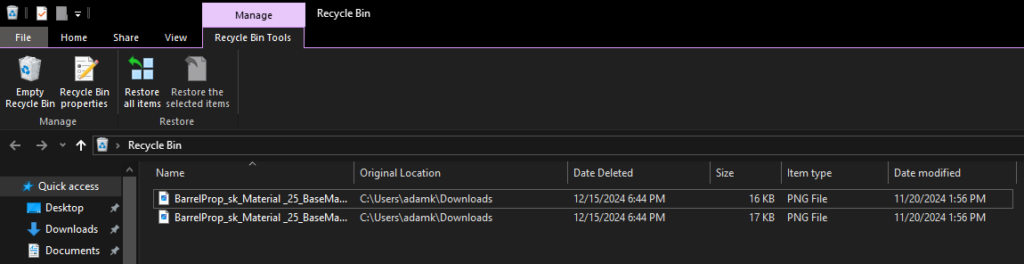
Remember, this will permanently delete any files within the recycle bin. Sort through the files contained in the recycle bin to make sure that you want to delete everything in there. If a file is in the recycle bin, it can still be restored. But once the recycle bin is emptied, it’s gone forever.
Answers to FAQs About Downloads
Can I delete downloaded app or software files after installation?
Yes. Usually, when you download a new app, there’s a file that’s placed within your downloads that you run to install that program on your PC. Once the app is installed, that download file will still be inside your downloads folder. You can usually safely delete this, as this can be considered the “packaging” that your app comes in.
Sometimes, though, you may want to make sure that the app doesn’t break immediately after you delete that folder. You should test the app after deleting the download files. There may be something within that folder that the app still needs.
Do downloads take up space?
Yes, if you right-click your downloads folder and select properties, you can see how much data the folder takes up and which drive the downloads folder is located in. This is typically your default drive. As you can see, this download folder gets pretty big and needs to be sorted through! (Related: How to free up space on your Windows 11 C Drive.)

Can you explain how to clear download history?
Downloads on Windows don’t have a history. Rather, you can just delete your files.
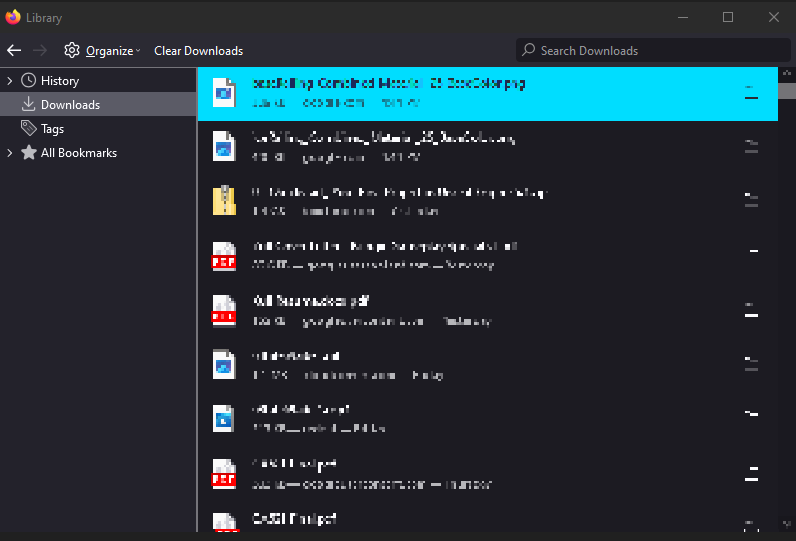
On a web browser, you do have a downloads history. Clear this by selecting the download icon in your corresponding browser. The below example is from Firefox. You’ll see all the files that you’ve downloaded. Select Clear Downloads to clear the history.
If I delete my downloads, will that delete the files?
Yes. When you download a file, if you delete it without moving it somewhere else, deleting it from the downloads folder will delete the file.
Sometimes when you move a downloaded file, it will copy that folder instead of physically moving the file from your downloads folder. This means that an identical version of the file will be located somewhere else on your PC. If this is the case, the original downloaded file can be safely deleted with no effect on the copied file.
If you clear the history of your downloads on your web browser, it will not delete the files. The files on your web browser and the files on your PC are separate.
ID 345255505 | Downloads | Thanadon Naksanee | Dreamstime.com


 Share On Twitter